Ridley Plushie Bloggy Blog Part 3: Upper Torso and Wings
Part 1: Research and Tail
Part 2: Lower Torso and Legs
Part 3: Upper Torso and Wings
Part 4: Putting stuff together and Hands
Part 5: Head and Closeups
Ridley Gallery
Dec. 29, 2014

Blah, the upper torso. There is so much happening here that I have to figure out. So many appendages coming out that have to be wired. Plus, I'm attempting to pinch the center front in such a way that will make it look like a ribcage. To wrap my mind around this all, I start by pinning together fabric.

Since I don't have the back of the torso figured out yet, I'm pinning my mockups to a pillow. I've sewn the 'pinches' of the chest. It results in lots of wierd wrinkles that I hope will go away once I stuff the body and apply 'trapunto' to the velvet. I'll explain what trapunto is later.

Further prototypes. Each time I make a fabric mockup, I'd transfer the pattern to paper, make adjustments, and try another fabric mockup.

I think this is it!

I had to test four iterations of the upper torso front.

This whole process of adjusting patterns over and over again was aided by my nifty cutting cable. It looks like a basic table, with a layer of muslin cloth over top of it.

SURPRISE IT WAS BUILT OVER A CRAZY LIGHT TABLE. I CAN SIMPLY TRACE OVER ALL MY PATTERNS. I HAVE NO NEED FOR TRACING PAPER ANYMORE HAHAHA (at least if the fabric is thin enough for light to shine through.)

The back of the upper torso is much more managable, now that the front is figured out. Ridley has a hunched back and I put a seam down the shoulderblades that will help control the shape of the back, and also act as a convenient location for the wings to emerge from.
Dec. 31, 2014

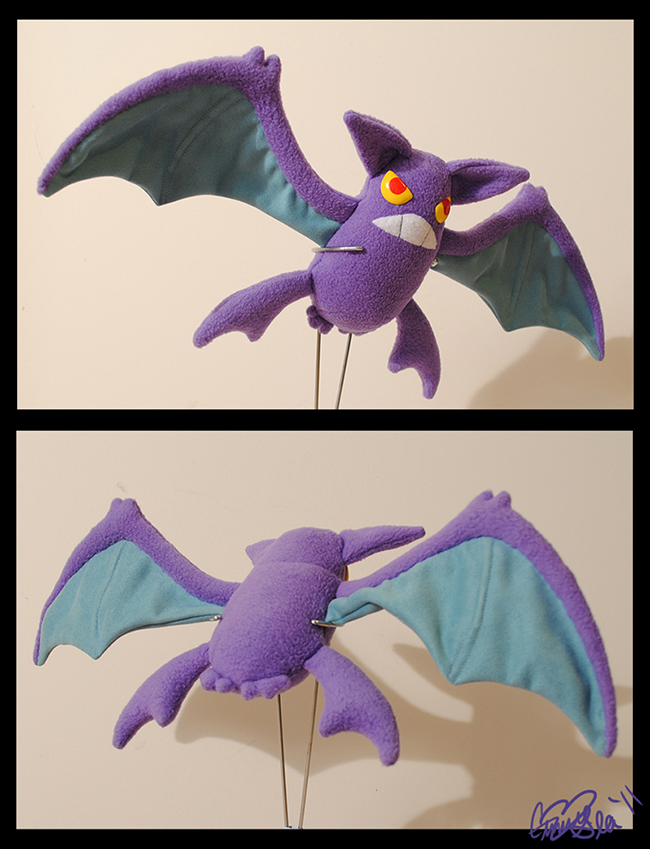
Oh man, I've been so excited to work on the wings. And I've spent many a night wondering about how it should be done. Because I am convinced that the style of wing I'm going for is actually impossible to do. The 'fingers' of the wing will have channels to allow for wires, while simultaneously encasing the seam allowances of the 'webbing'. This ideal version will have no topstitching, no handstitching, and no raw edges showing. I have never seen any example of this. Because in order to do this, the material of all the webbing and the rest of the wing must fit in those skinny little fingers and then be turned inside out. Nope, not happening. This Crobat plushie I made has hand stitching where the two fabric types meet, and the middle finger has machine topstitching. For the Ridley wing, I have decided that I will topstitch all the wire channels, attempting to sew 'in the ditch' on both layers at the same time. I'll explain more later.

With the main body figured out, I can make a big drawing of the wing that is proportional to the body. I'm paying attention to the fingers and also to the negative space between them to make sure they don't look weird. The 'webbing' shouldn't be too curved, since curves are awkward to sew.

Using the sketch of the wing, I trace out individual pattern pieces with seam allowance, lable them, and cut them out of fabric. Each wing has 20 pattern pieces. Yikes.

This isn't two wings; this is just the front and back of one wing. :p I had a little bit of trouble sewing the velvet to the vinyl, since velvet will slip around. I have to use an awl to constantly control the fabric as it goes under the sewing machine needle.

One finished layer of a wing from the underside. All the seam allowances have to be ironed open.

So now that both layers are ready, it's time to put them together. In order to make the wire channels, I will be using a 'stitch in the ditch' technique. What this is, is to stitch very carefully right between where the two pieces of fabric meet, such that the topstitching will disappear within the 'ditch'. This is a common technique in the quilting world, but here it's more complicated in that I have to stitch in the ditch on both layers of wing at the same time. And even that isn't too unusual; that's how boning channels are made in corsets. What's even more difficult for me is that the velvet shifts around during sewing, so the two wing layers are not going to match exactly. I try my best to perfectly match the layers by using pins and by using feel. If I had the time, I would have hand basted the two layers together for the most precision.

The front of the wing would have mostly perfect stitch in the ditch, but the back side that I couldn't see will have some misses.

There we go, a finished wing!

Here's the wire for the wing fingers. It can be a bit of a bear to stuff the wires down the right channels, with all the encased seam allowances in the way. I just gotta do it by feel.

And as it turns out, the fabric and stuffing of the wing is too heavy for the wires. I had to add extra lengths of wire for support.
