Ooblets: Manufacturing Plushies is a Collaborative Process
I used to be a prototyper for Fangamer, working by contract on a project-to-project basis. But more recently, I've been hired on as a full time employee. Since then, most plushies that get produced by Fangamer passes by my hands, even if I'm not prototyping them directly. I address any snags in the manufacturing process and communicate directly with the overseas factory, which can be something of a challenge! Not only are there language, cultural, technological, and straight-up geographical barriers, but it's often a hurdle to get everyone on the same page, especially when everyone (including the developers, Fangamer employees, and the team on the factory side) has differing skills, visions, and requirements for the final product.
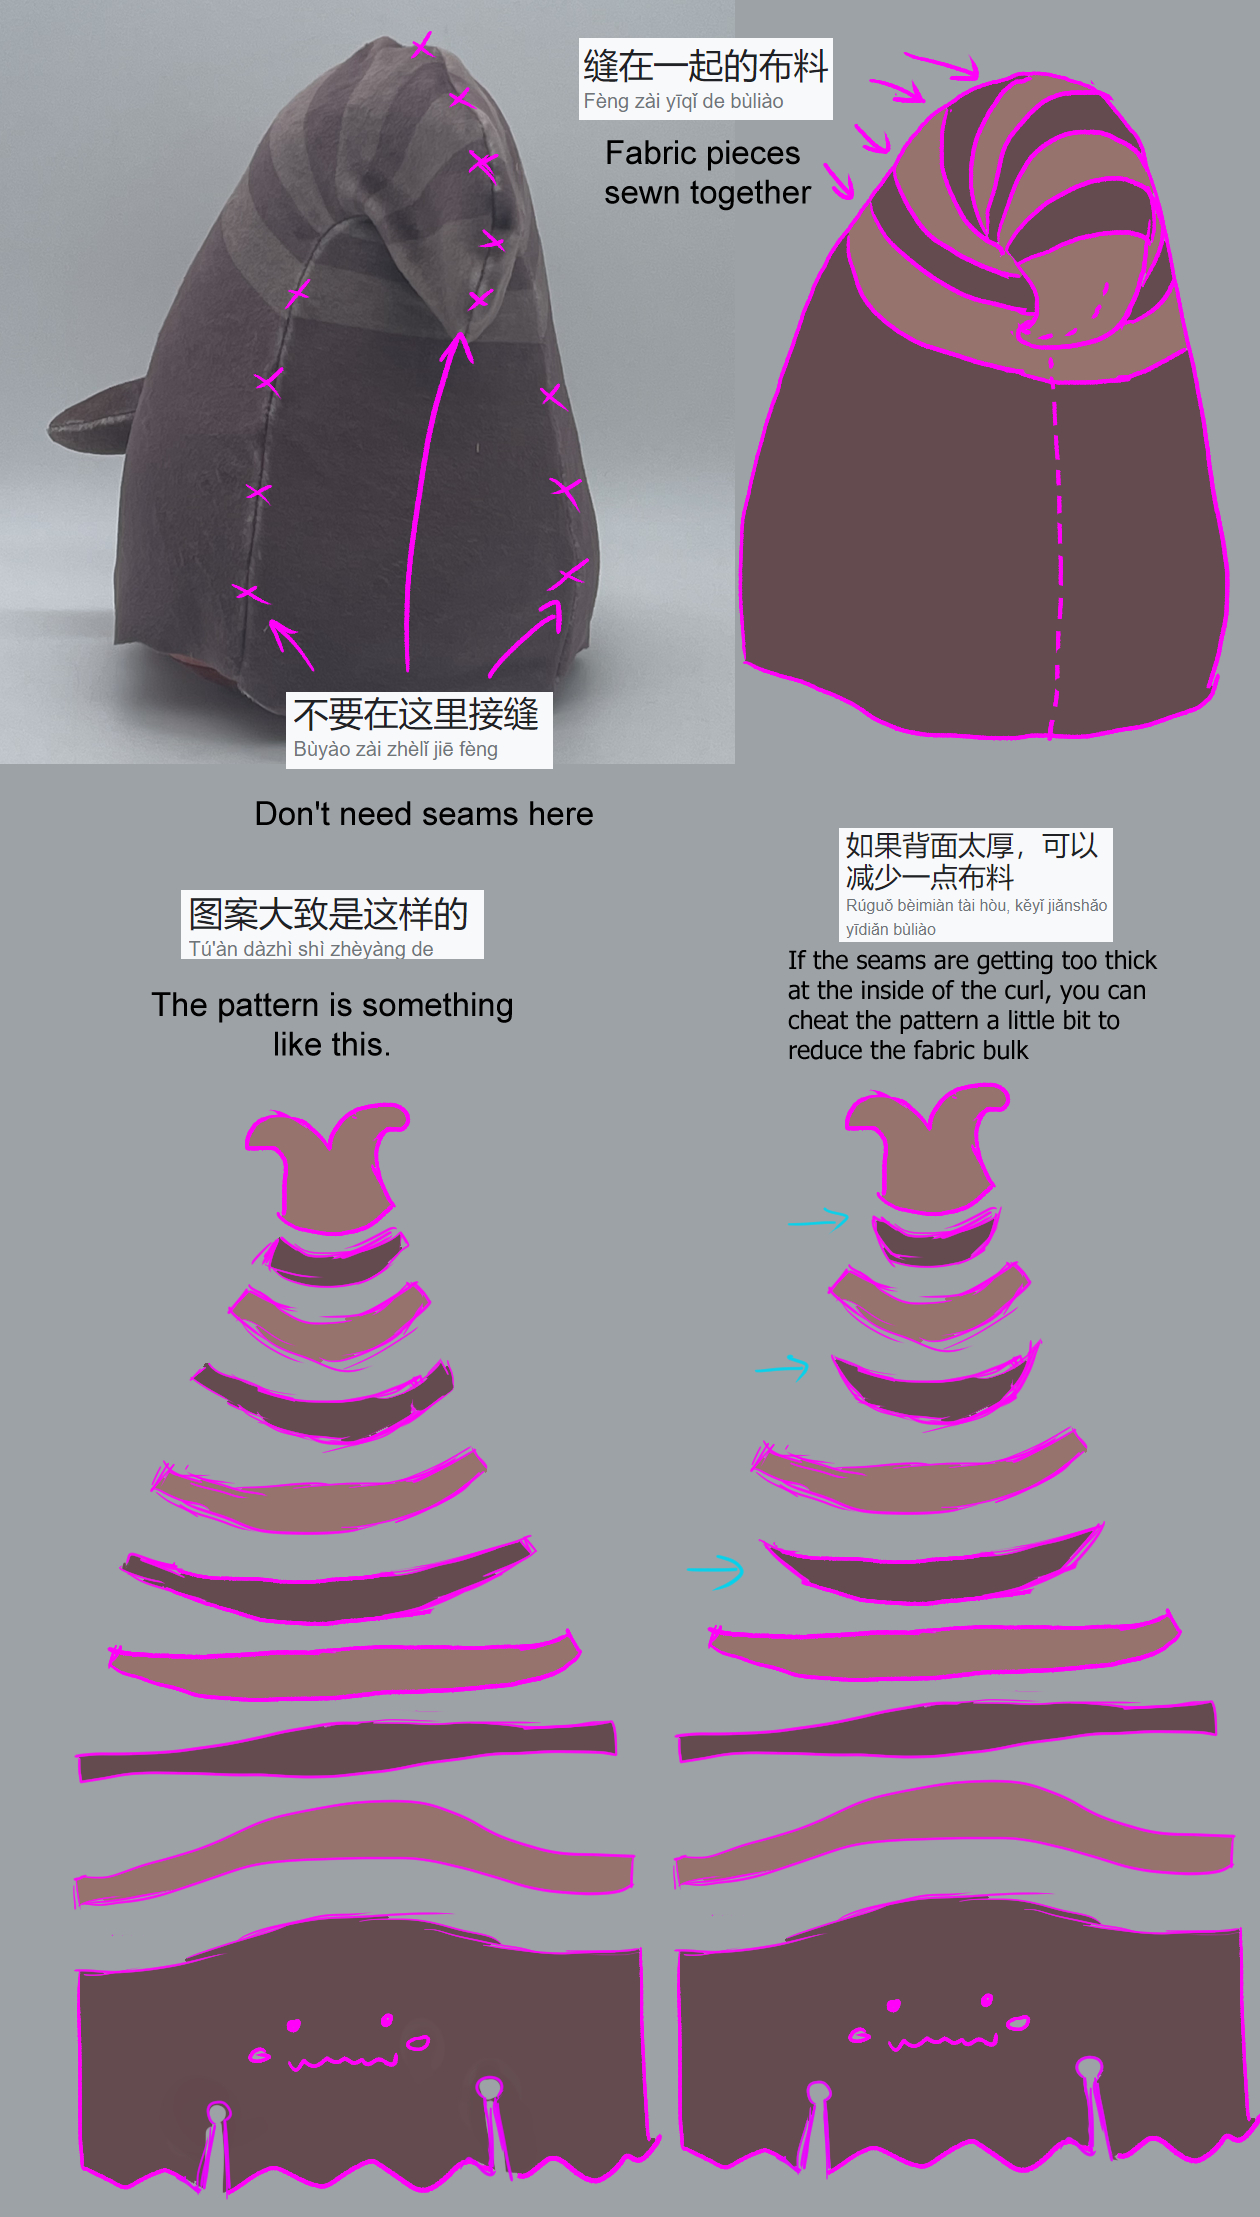
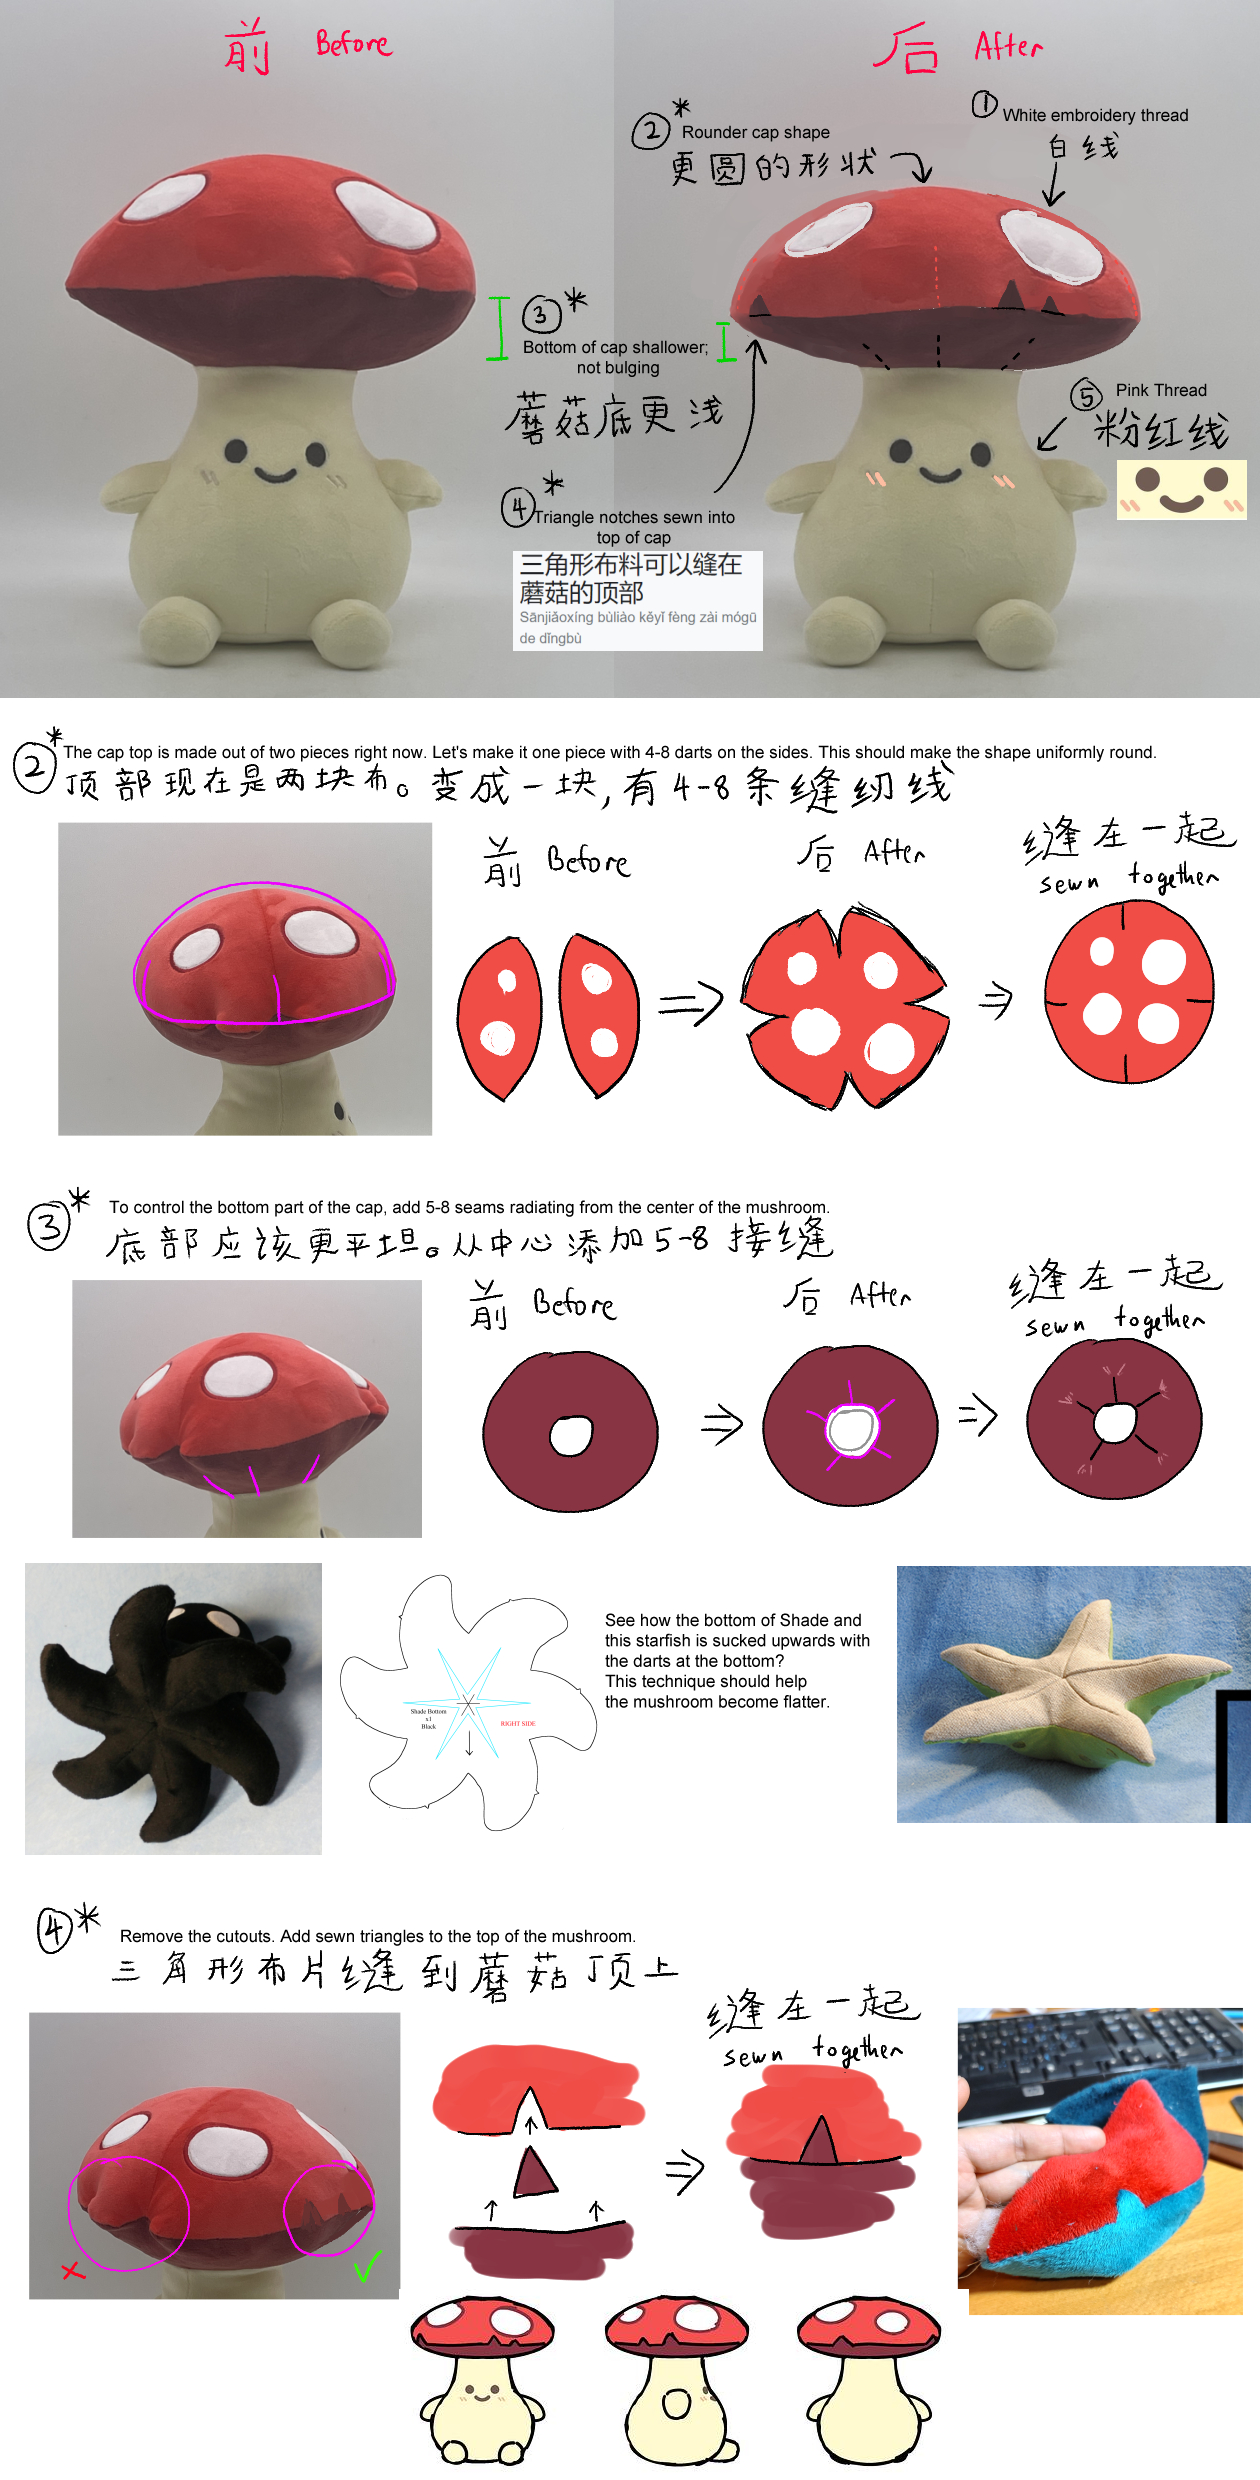
The three newly released Ooblets plushies all required some pattern-level help in their production, which is where I jump in. The first sample of Clomper here had raw-cut fabric pieces in place of the ears and small branches, which we wanted to make into 3D objects. I also asked for changes to the positions of the seams, which would alter the overall shape. To communicate what changes we wanted, I would use a combination of draw-overs, drawings, photos, patterns, and English and Mandarin. I tried to be as clear as possible. It took a lot of time to make so many notes, but if it could save a round of sampling, reduce confusion, and improve the overall quality of the plushie, then I would have saved some time overall. Here's one page of my notes.

My Mandarin is not very good...! I had to use Google Translate a lot to painstakingly cut and paste what I wanted to say. Although the factories we work with usually have an English-speaking representative, their mastery is often not at the level of a native speaker. And even if they are, they are not necessarily very skilled with sewing. Using Mandarin helps me communicate directly with the seamsters that are making the plushie.
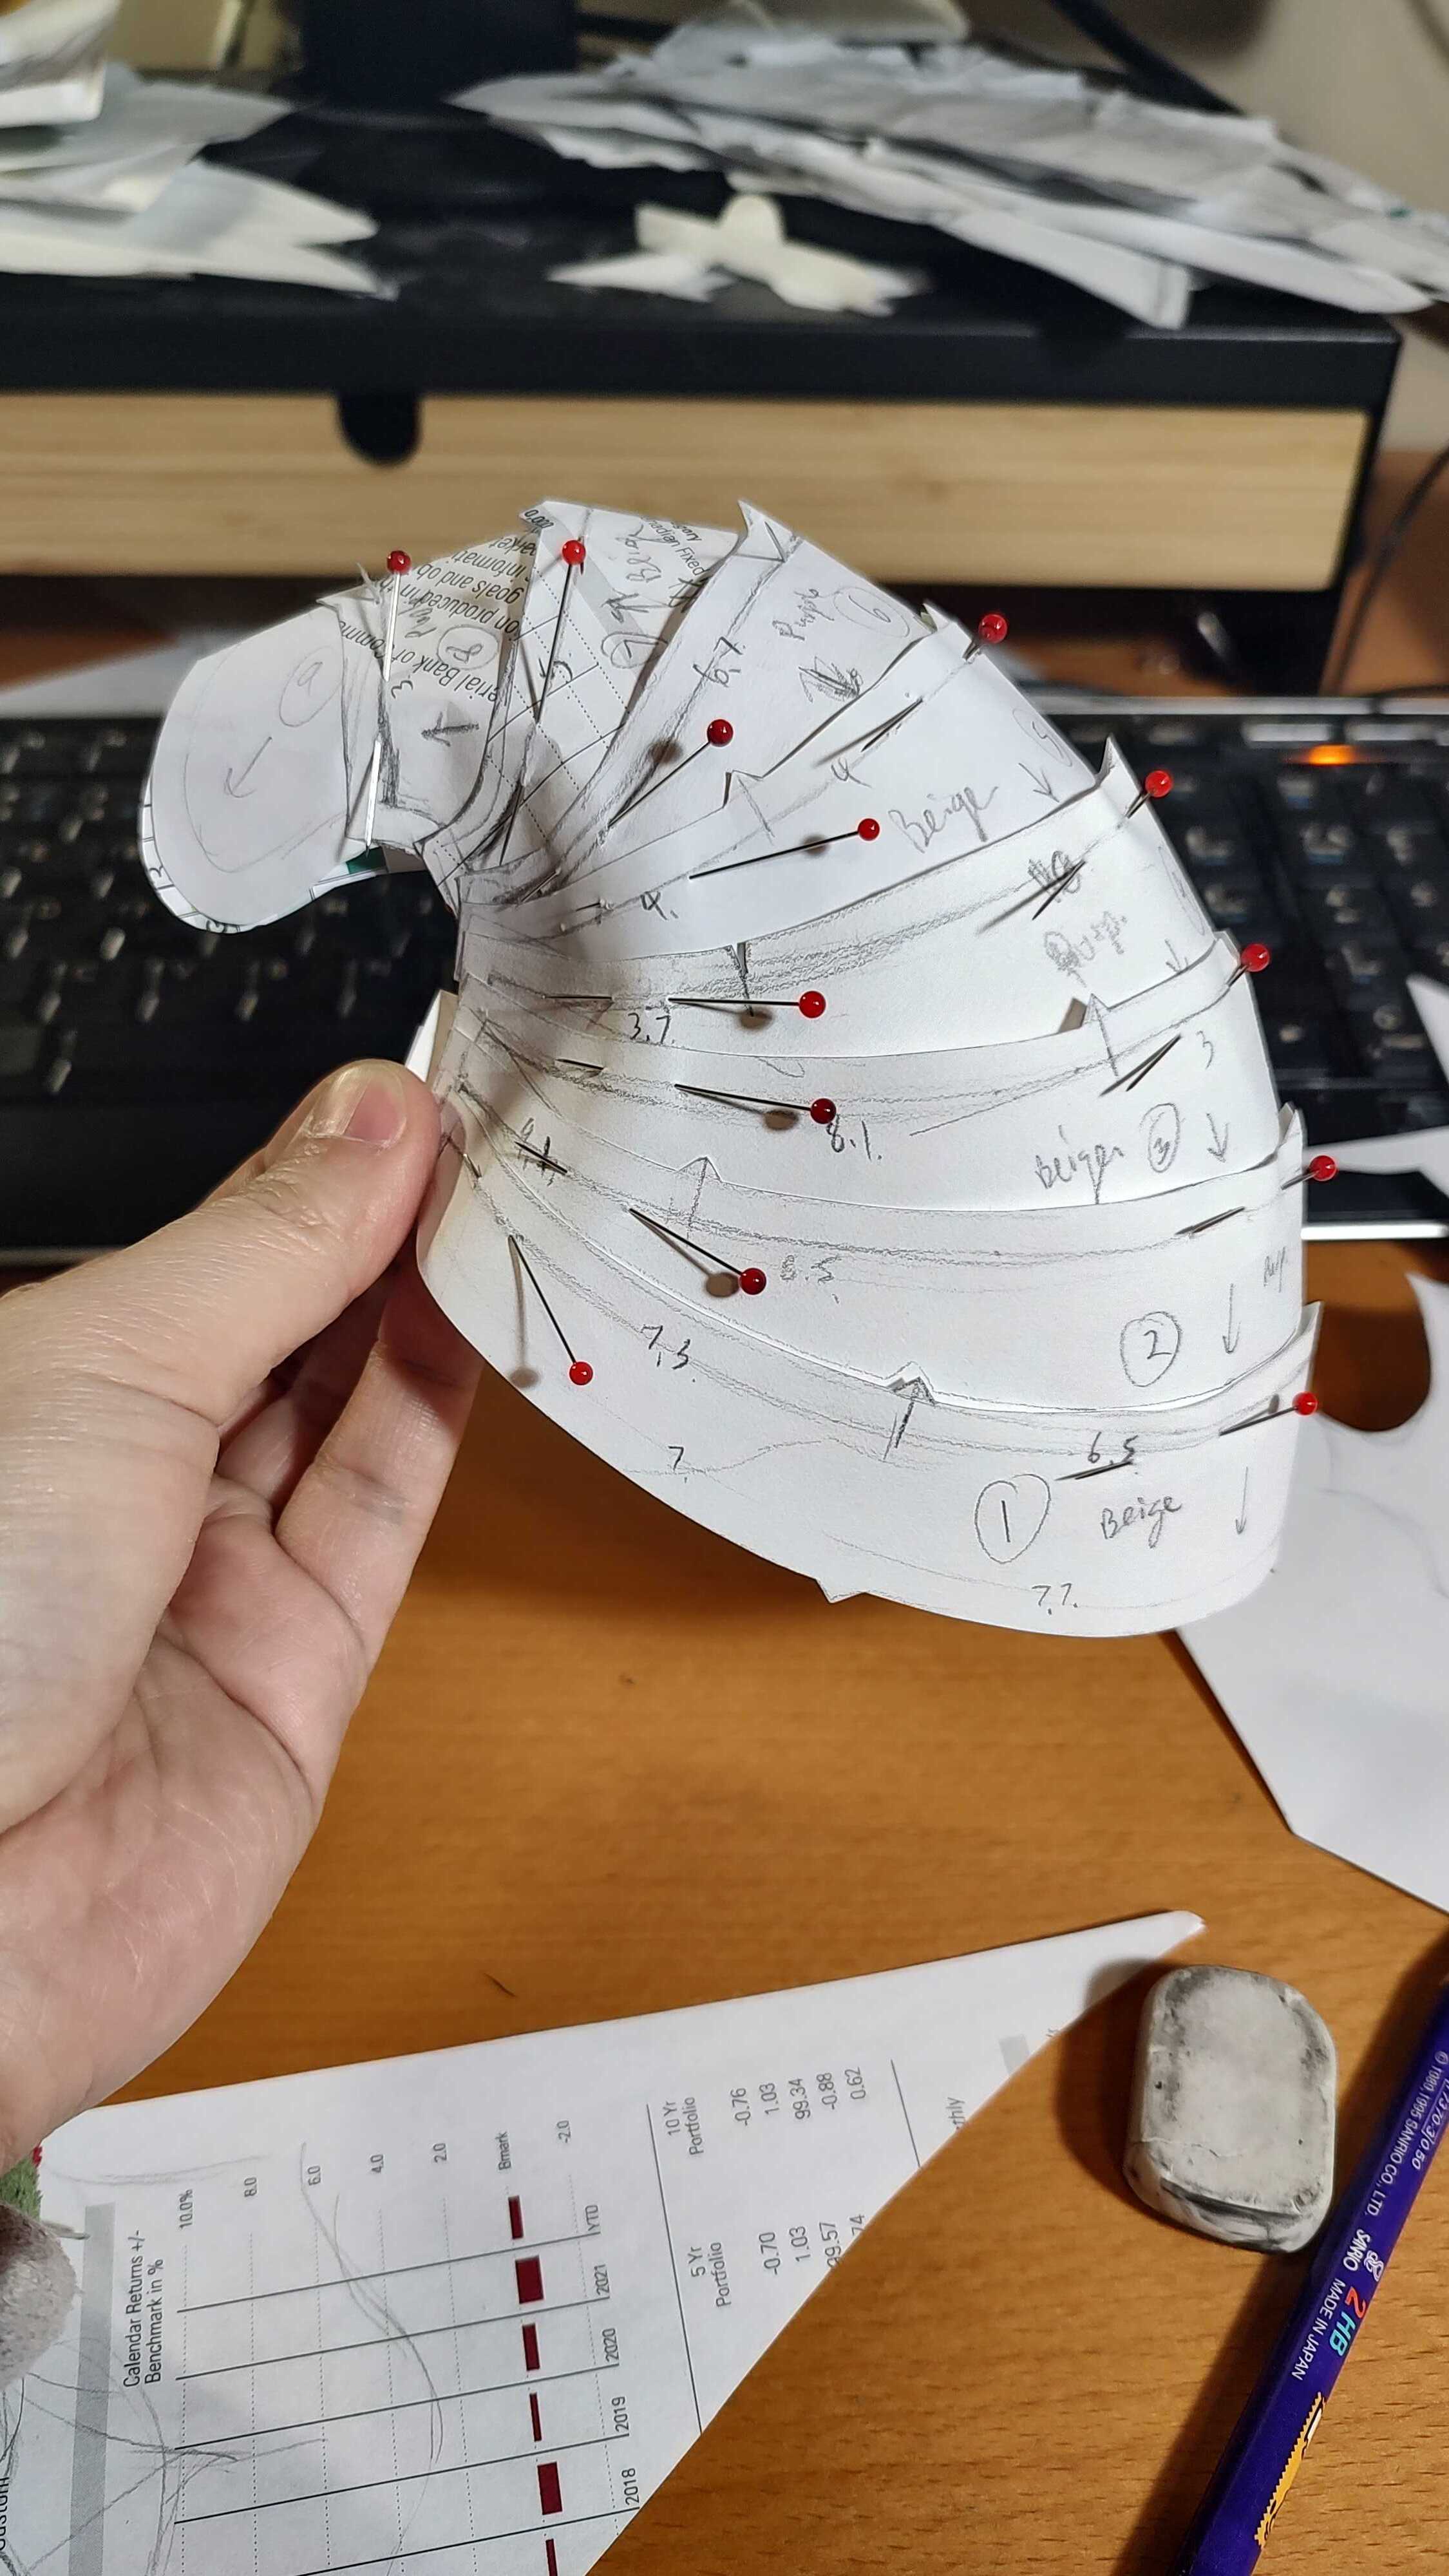
Glanter started out with their body being mostly printed. But I felt that sewn fabric stripes would look better and would aid the curve and taper of their head.
It's something of a geometric puzzle to assemble the correct shapes of fabric stripes to achieve curves. It's an exercise in fabric manipulation that I rather enjoy!
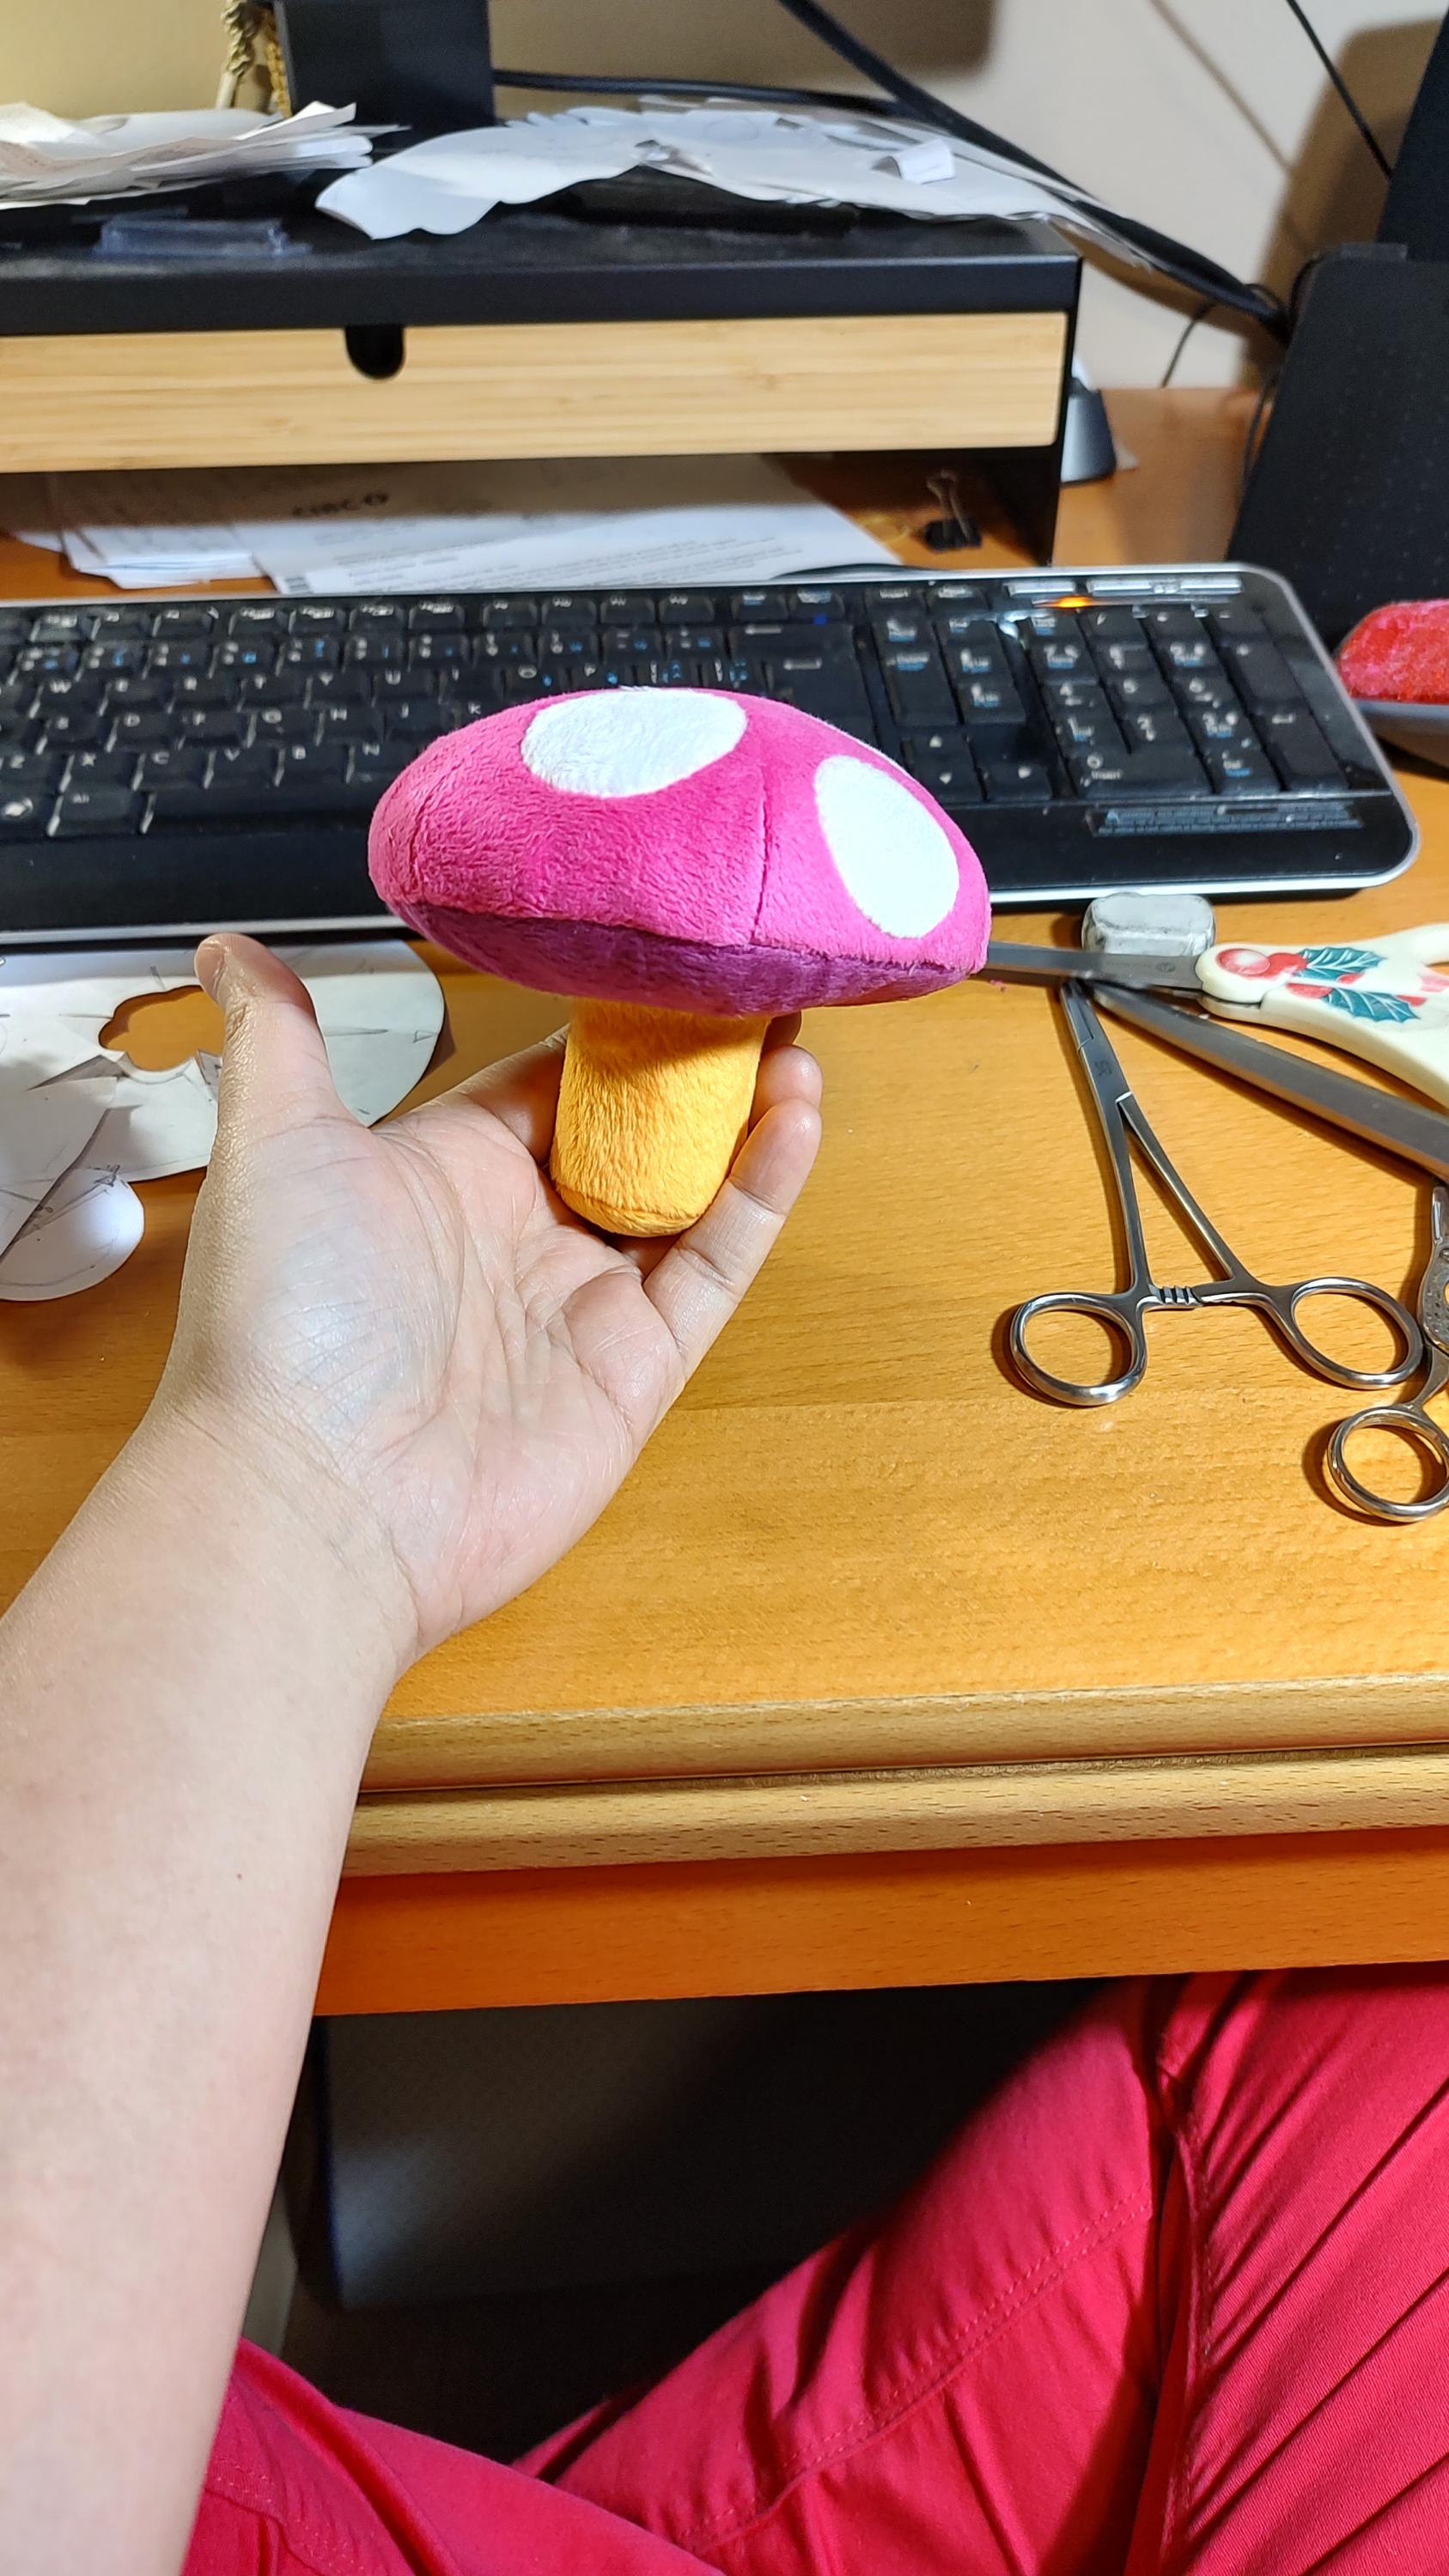
Shrumbo's first sample had a great body, but the cap needed a few additional rounds of sampling. The notches cut right into the cap, which distorted it. The cap's shape was wonky and the mushroom gills bulged out as much as the cap. I suggested that the notches simply be little triangles sewn into the cap instead of actual notches. If the top of the cap was one piece of fabric with 4 darts instead of two pieces with no darts, then the shaping of the cap can be more evenly distributed. And the gills can be somewhat flattened if they had narrow darts running towards the center. That last alteration only had a slight effect; the stretchiness of the baby minky we were using proved to be too powerful, so in the final plushie the gills still bulge out quite a bit. Another issue with the stretchy baby minky was that applique embroidery didn't work very well. The white spots were originally appliqued fabric, but the embroidered edge wobbled quite a bit. So I suggested that the spots be directly sewn into the cap.
To test all of my suggestions, I made a half-scale mushroom cap. This is also very useful because I now have a pattern to share with the factory, so their next sample will be very close to perfect. I gave my mushroom a stem because then I have a finished mushroom plushie. It's so cute! Maybe one day I'll make a tutorial out of this pattern.
